So you want to play some audio in your iOS app? This is a relatively simple task, but what if you want to be able to control the volume as well? Let’s dive in and create a super simple app that does just that.
Before we get started, I just want to note that this tutorial was written using Xcode 7 and Swift 2. Since Swift 2 is pretty new, it’s tough to find example code out there that works! I hope that this will be a valuable resource.
Fire up a new Xcode project
For this tutorial I selected the Single View Application template and I’m targeting only the iPhone

Add Some Audio
Now we’ve got a play button, we’ll need something to play. Right-click (or Control-click) on your project folder in the Navigator and choose “Add files to <your project>”. Then find your favourite song or any other audio clip. Make sure that you select Copy items if needed!


Set Up The Play Button
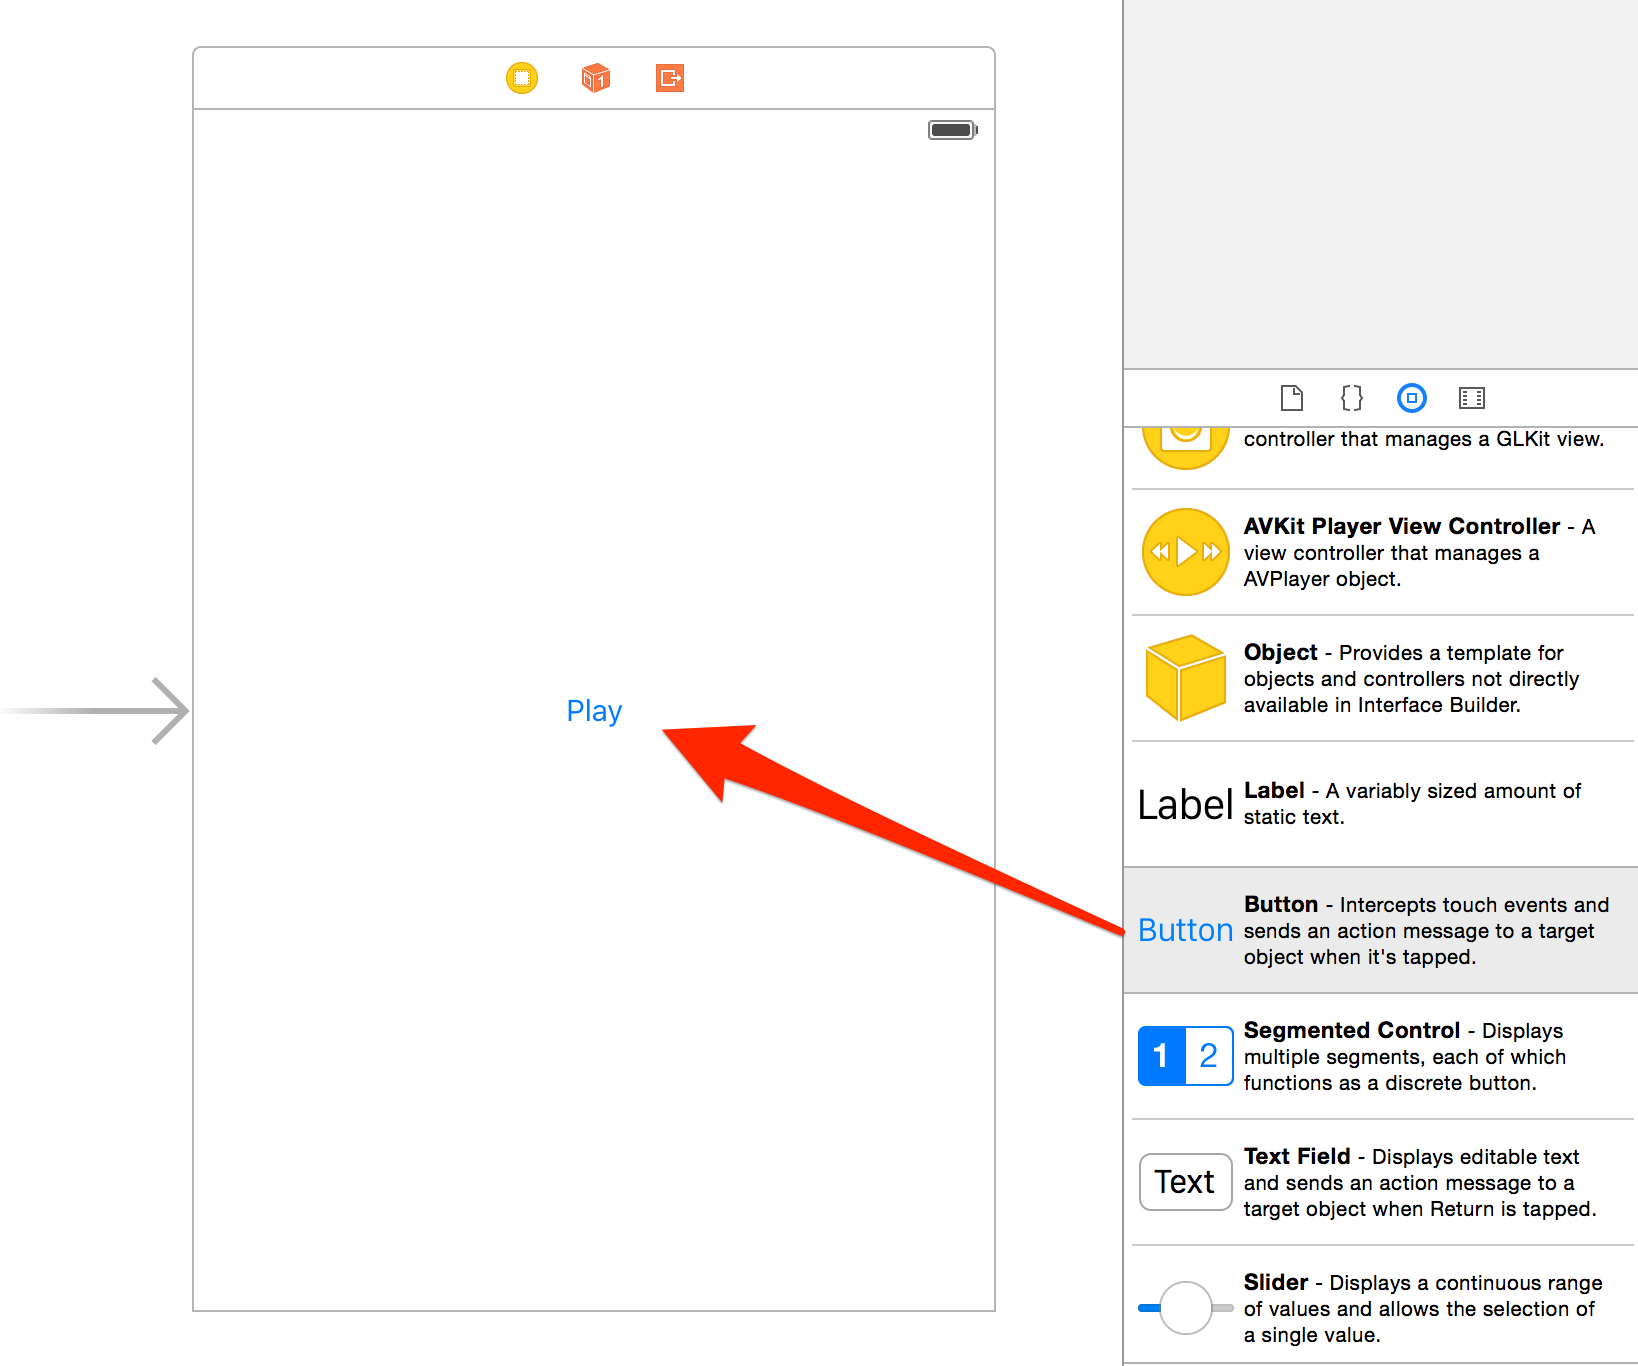
If we’re going to play audio, we’ll need a button to start playback. Open up Main.storyboard in the Interface Builder, and drag a Button from the Object Library on to the storyboard:
Add an Action to the View Controller
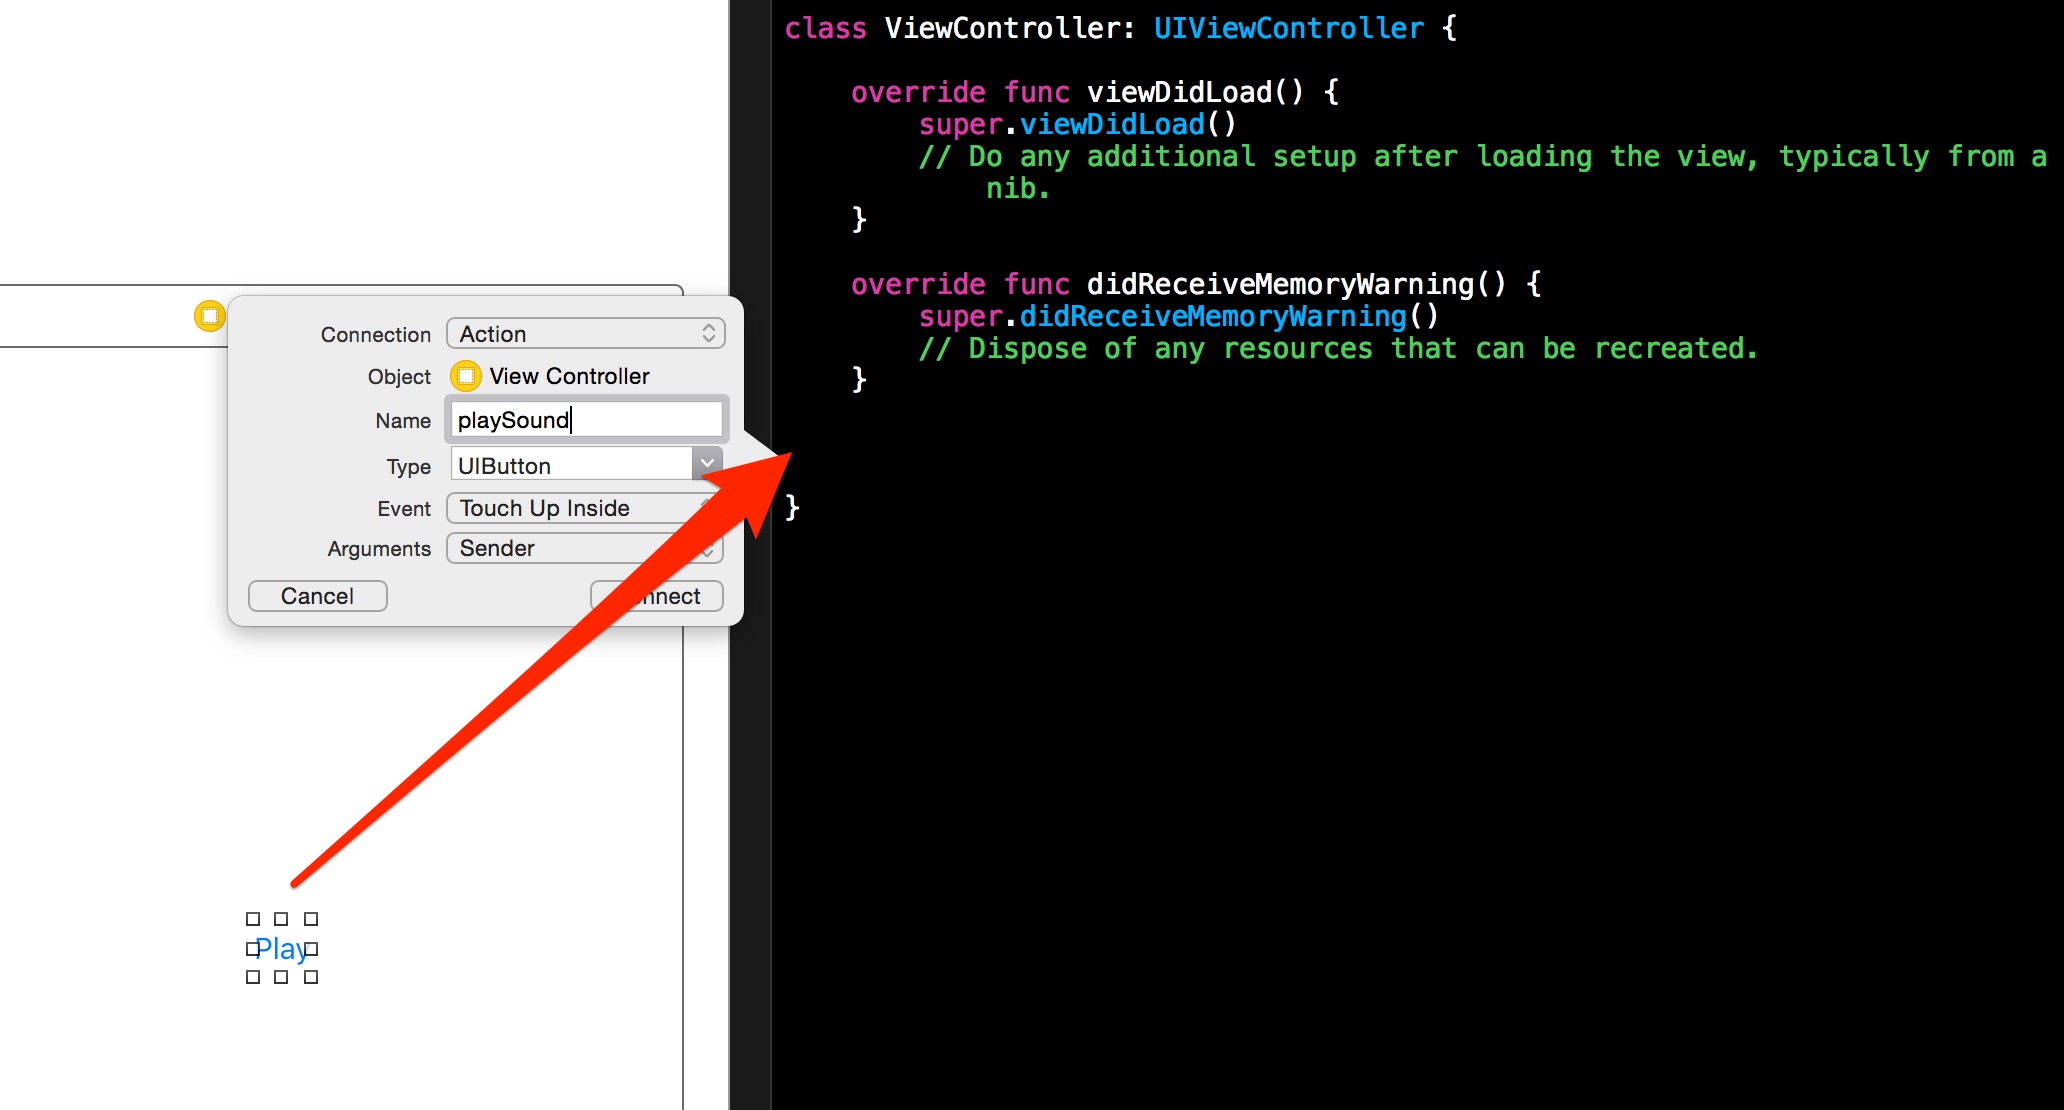
Next we’ll need to add an action so that we can execute some code when the button is pressed. Just Control-drag from the button to ViewController.swift, set the connection to Action and give it a name (ie: playButton)
Write Some Code To Play Audio
Open up ViewController.swift, and add a new import statement. We need to import the AVFoundation framework:
import UIKit
import AVFoundation
Then we’ll need to make a new class variable to contain our audio player. We’ll be making use of the AVAudioPlayer class to accomplish this. (Add this immediately under the class definition)
var audioPlayer: AVAudioPlayer!
Next add the following code inside the viewDidLoad() function:
if let filePath = NSBundle.mainBundle().pathForResource("my_fav_song", ofType: "mp3", inDirectory: "") {
    // Good, got a file
    let filePathUrl = NSURL.fileURLWithPath(filePath)

    // Try to instantiate the audio player
    do {
        self.audioPlayer = try AVAudioPlayer(contentsOfURL: filePathUrl)
    } catch {
        print(error)
    }
} else {
    print("filePath is empty!")
}
What are we doing here you ask? Here’s what happening:
- We’re building the path to our audio file using NSBundle.mainBundle(), which gets the location of the current application on the device (our running app). We then locate the audio file by supplying it’s name and file type.
- The AVAudioPlayer class (the class we’ll be using to play our audio file) needs to be instantiated with an NSURL, since our filePath is a string, we use the NSURL.fileURLWithPath() function to convert it.
- Next we’re using a do-catch statement to handle any potential errors that come up when we instantiate the AVAudioPlayer
The last thing we need to do to play the audio is to add a few lines of code to the playSound action we created earlier:
self.audioPlayer.currentTime = 0.0
self.audioPlayer.stop()
self.audioPlayer.play()
I think this is pretty self explanatory! But I’ll break it down. First we’re setting the currentTime to 0.0. This will restart the audio if the play button is pressed again. For good measure, we call audioPlayer.stop() to stop the player before starting the audio. Finally we’ll play the audio with audioPlayer.play()
That’s it for code for now. If you run the app in the simulator or on your device. You should be able to tap ‘Play’ and hear your audio!
Volume Control
Now that we’ve got our audio playing, we’re going to add a volume control to our app. To do this we’re going to use the MPVolumeView class. It turns out, this is relatively simply to implement (after much trail and error on my part!).
There is however, one huge caveat: The MPVolumeView will now show up if you test the app in the iOS Simulator. You’ll need to test the app directly on your iPhone to get it to work.
To add the MPVolumeView, drag a generic View object onto the storyboard in the Interface Builder. Then, under the Identity Inspector, enter MPVolumeView as the view’s custom class.

Then for good measure, create and outlet for the volume view:

Lastly, you’ll want to set the background of your app view to something dark, as the MPVolumeView wont show up with a white background. I chose a dark grey with a white tint:

That’s it! If you run the app on your iPhone, you’ll now be able to control the volume of playback. Here’s what it looks like:

Bonus Feature!
Did you notice that icon on the right of the volume slider? You’ve probably seen it before. Adding the MPVolumeView also gives us the ability to route the audio to an external source (ie: an Apple TV)

